Summary #
- An IDL is a file representing the structure of a Solana program. Programs written and built using Anchor automatically generate a corresponding IDL. IDL stands for Interface Description Language.
@coral-xyz/anchoris a Typescript client that includes everything you’ll need to interact with Anchor programs- An Anchor
Providerobject combines aconnectionto a cluster and a specifiedwalletto enable transaction signing - An Anchor
Programobject provides a custom API to interact with a specific program. You create aPrograminstance using a program's IDL andProvider. - The Anchor
MethodsBuilderprovides a simple interface throughProgramfor building instructions and transactions
Lesson #
Anchor simplifies the process of interacting with Solana programs from the
client by providing an Interface Description Language (IDL) file that reflects
the structure of a program. Using the IDL in conjunction with Anchor's
Typescript library (@coral-xyz/anchor) provides a simplified format for
building instructions and transactions.
// sends transaction
await program.methods
  .instructionName(instructionDataInputs)
  .accounts({})
  .signers([])
  .rpc();
This works from any Typescript client, whether it's a frontend or integration
tests. In this lesson we'll go over how to use @coral-xyz/anchor to simplify
your client-side program interaction.
Anchor client-side structure #
Let's start by going over the basic structure of Anchor's Typescript library.
The primary object you'll be using is the Program object. A Program instance
represents a specific Solana program and provides a custom API for reading and
writing to the program.
To create an instance of Program, you'll need the following:
- IDL - file representing the structure of a program
Connection- the cluster connectionWallet- default keypair used to pay for and sign transactionsProvider- encapsulates theConnectionto a Solana cluster and aWalletProgramId- the program’s onchain address
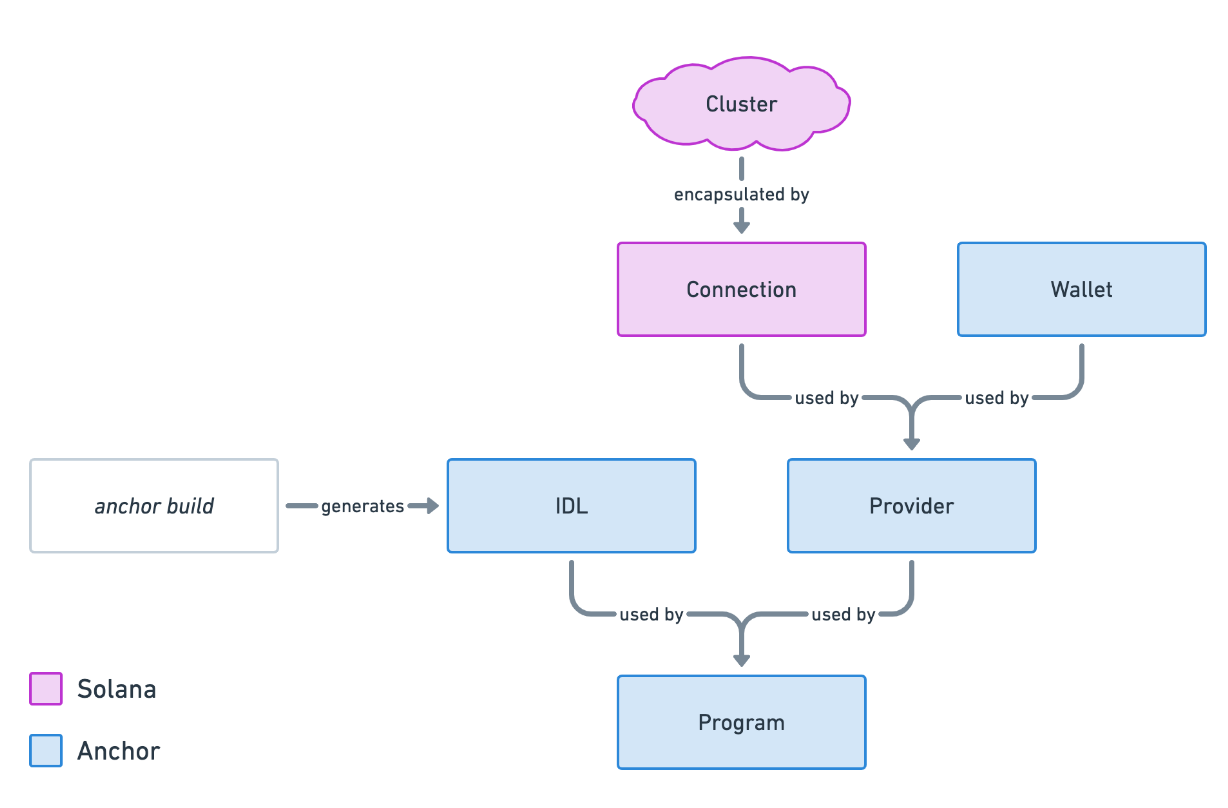 Anchor structure
The above image shows how each of these pieces are combined to create a
Program instance. We'll go over each of them individually to get a better idea
of how everything ties together.
Interface Description Language (IDL) #
When you build an Anchor program, Anchor generates both a JSON and Typescript file representing your program's IDL. The IDL represents the structure of the program and can be used by a client to infer how to interact with a specific program.
While it isn't automatic, you can also generate an IDL from a native Solana program using tools like shank by Metaplex.
To get an idea of the information an IDL provides, here is the IDL for the counter program you built previously:
{
  "version": "0.1.0",
  "name": "counter",
  "instructions": [
    {
      "name": "initialize",
      "accounts": [
        { "name": "counter", "isMut": true, "isSigner": true },
        { "name": "user", "isMut": true, "isSigner": true },
        { "name": "systemProgram", "isMut": false, "isSigner": false }
      ],
      "args": []
    },
    {
      "name": "increment",
      "accounts": [
        { "name": "counter", "isMut": true, "isSigner": false },
        { "name": "user", "isMut": false, "isSigner": true }
      ],
      "args": []
    }
  ],
  "accounts": [
    {
      "name": "Counter",
      "type": {
        "kind": "struct",
        "fields": [{ "name": "count", "type": "u64" }]
      }
    }
  ]
}
Inspecting the IDL, you can see that this program contains two instructions
(initialize and increment).
Notice that in addition to specifying the instructions, it species the accounts
and inputs for each instruction. The initialize instruction requires three
accounts:
counter- the new account being initialized in the instructionuser- the payer for the transaction and initializationsystemProgram- the system program is invoked to initialize a new account
And the increment instruction requires two accounts:
counter- an existing account to increment the count fielduser- the payer from the transaction
Looking at the IDL, you can see that in both instructions the user is required
as a signer because the isSigner flag is marked as true. Additionally,
neither instructions require any additional instruction data since the args
section is blank for both.
Looking further down at the accounts section, you can see that the program
contains one account type named Counter with a single count field of type
u64.
Although the IDL does not provide the implementation details for each instruction, we can get a basic idea of how the onchain program expects instructions to be constructed and see the structure of the program accounts.
Regardless of how you get it, you need an IDL file to interact with a program
using the @coral-xyz/anchor package. To use the IDL, you'll need to include
the IDL file in your project and then import the file.
import idl from "./idl.json";Provider #
Before you can create a Program object using the IDL, you first need to create
an Anchor Provider object.
The Provider object combines two things:
Connection- the connection to a Solana cluster (i.e. localhost, devnet, mainnet)Wallet- a specified address used to pay for and sign transactions
The Provider is then able to send transactions to the Solana blockchain on
behalf of a Wallet by including the wallet’s signature to outgoing
transactions. When using a frontend with a Solana wallet provider, all outgoing
transactions must still be approved by the user via their wallet browser
extension.
Setting up the Wallet and Connection would look something like this:
import { useAnchorWallet, useConnection } from "@solana/wallet-adapter-react";

const { connection } = useConnection();
const wallet = useAnchorWallet();
To set up the connection, you can use the useConnection hook from
@solana/wallet-adapter-react to get the Connection to a Solana cluster.
Note that the Wallet object provided by the useWallet hook from
@solana/wallet-adapter-react is not compatible with the Wallet object that
the Anchor Provider expects. However, @solana/wallet-adapter-react also
provides a useAnchorWallet hook.
For comparison, here is the AnchorWallet from useAnchorWallet:
export interface AnchorWallet {
  publicKey: PublicKey;
  signTransaction(transaction: Transaction): Promise<Transaction>;
  signAllTransactions(transactions: Transaction[]): Promise<Transaction[]>;
}
And the WalletContextState from useWallet:
export interface WalletContextState {
  autoConnect: boolean;
  wallets: Wallet[];
  wallet: Wallet | null;
  publicKey: PublicKey | null;
  connecting: boolean;
  connected: boolean;
  disconnecting: boolean;
  select(walletName: WalletName): void;
  connect(): Promise<void>;
  disconnect(): Promise<void>;
  sendTransaction(
    transaction: Transaction,
    connection: Connection,
    options?: SendTransactionOptions,
  ): Promise<TransactionSignature>;
  signTransaction: SignerWalletAdapterProps["signTransaction"] | undefined;
  signAllTransactions:
    | SignerWalletAdapterProps["signAllTransactions"]
    | undefined;
  signMessage: MessageSignerWalletAdapterProps["signMessage"] | undefined;
}
The WalletContextState provides much more functionality compared to the
AnchorWallet, but the AnchorWallet is required to set up the Provider
object.
To create the Provider object you use AnchorProvider from
@coral-xyz/anchor.
The AnchorProvider constructor takes three parameters:
connection- theConnectionto the Solana clusterwallet- theWalletobjectopts- optional parameter that specifies the confirmation options, using a default setting if one is not provided
Once you’ve created the Provider object, you then set it as the default
provider using setProvider.
import { useAnchorWallet, useConnection } from "@solana/wallet-adapter-react";
import { AnchorProvider, setProvider } from "@coral-xyz/anchor";

const { connection } = useConnection();
const wallet = useAnchorWallet();
const provider = new AnchorProvider(connection, wallet, {});
setProvider(provider);
Program #
Once you have the IDL and a provider, you can create an instance of Program.
The constructor requires three parameters:
idl- the IDL as typeIdlprogramId- the onchain address of the program as astringorPublicKeyProvider- the provider discussed in the previous section
The Program object creates a custom API you can use to interact with a Solana
program. This API is the one stop shop for all things related to communicating
with onchain programs. Among other things, you can send transactions, fetch
deserialized accounts, decode instruction data, subscribe to account changes,
and listen to events. You can also
learn more about the Program class.
To create the Program object, first import Program and Idl from
@coral-xyz/anchor. Idl is a type you can use when working with Typescript.
Next, specify the programId of the program. We have to explicitly state the
programId since there can be multiple programs with the same IDL structure
(i.e. if the same program is deployed multiple times using different addresses).
When creating the Program object, the default Provider is used if one is not
explicitly specified.
All together, the final setup looks something like this:
import idl from "./idl.json";
import { useAnchorWallet, useConnection } from "@solana/wallet-adapter-react";
import { Program, Idl, AnchorProvider, setProvider } from "@coral-xyz/anchor";

const { connection } = useConnection();
const wallet = useAnchorWallet();

const provider = new AnchorProvider(connection, wallet, {});
setProvider(provider);

const programId = new PublicKey("JPLockxtkngHkaQT5AuRYow3HyUv5qWzmhwsCPd653n");
const program = new Program(idl as Idl, programId);
Anchor MethodsBuilder #
Once the Program object is set up, you can use the Anchor Methods Builder to
build instructions and transactions related to the program. The MethodsBuilder
uses the IDL to provide a simplified format for building transactions that
invoke program instructions.
Note that the camel case naming convention is used when interacting with a program from the client, compared to the snake case naming convention used when the writing the program in rust.
The basic MethodsBuilder format looks like this:
// sends transaction
await program.methods
  .instructionName(instructionDataInputs)
  .accounts({})
  .signers([])
  .rpc();
Going step by step, you:
- Call
methodsonprogram- this is the builder API for creating instruction calls related to the program's IDL - Call the instruction name as
.instructionName(instructionDataInputs)- simply call the instruction using dot syntax and the instruction's name, passing in any instruction arguments as comma-separated values - Call
accounts- using dot syntax, call.accounts, passing in an object with each account the instruction expects based on the IDL - Optionally call
signers- using dot syntax, call.signers, passing in an array of additional signers required by the instruction - Call
rpc- this method creates and sends a signed transaction with the specified instruction and returns aTransactionSignature. When using.rpc, theWalletfrom theProvideris automatically included as a signer and does not have to be listed explicitly.
Note that if no additional signers are required by the instruction other than
the Wallet specified with the Provider, the .signer([]) line can be
excluded.
You can also build the transaction directly by changing .rpc() to
.transaction(). This builds a Transaction object using the instruction
specified.
// creates transaction
const transaction = await program.methods
  .instructionName(instructionDataInputs)
  .accounts({})
  .transaction();

await sendTransaction(transaction, connection);
Similarly, you can use the same format to build an instruction using
.instruction() and then manually add the instructions to a new transaction.
This builds a TransactionInstruction object using the instruction specified.
// creates first instruction
const instructionOne = await program.methods
  .instructionOneName(instructionOneDataInputs)
  .accounts({})
  .instruction();

// creates second instruction
const instructionTwo = await program.methods
  .instructionTwoName(instructionTwoDataInputs)
  .accounts({})
  .instruction();

// add both instruction to one transaction
const transaction = new Transaction().add(instructionOne, instructionTwo);

// send transaction
await sendTransaction(transaction, connection);
In summary, the Anchor MethodsBuilder provides a simplified and more flexible
way to interact with onchain programs. You can build an instruction, a
transaction, or build and send a transaction using basically the same format
without having to manually serialize or deserialize the accounts or instruction
data.
Fetch program accounts #
The Program object also allows you to easily fetch and filter program
accounts. Simply call account on program and then specify the name of the
account type as reflected on the IDL. Anchor then deserializes and returns all
accounts as specified.
The example below shows how you can fetch all existing counter accounts for
the Counter program.
const accounts = await program.account.counter.all();You can also apply a filter by using memcmp and then specifying an offset
and the bytes to filter for.
The example below fetches all counter accounts with a count of 0. Note that
the offset of 8 is for the 8 byte discriminator Anchor uses to identify
account types. The 9th byte is where the count field begins. You can refer to
the IDL to see that the next byte stores the count field of type u64. Anchor
then filters for and returns all accounts with matching bytes in the same
position.
const accounts = await program.account.counter.all([
  {
    memcmp: {
      offset: 8,
      bytes: bs58.encode(new BN(0, "le").toArray()),
    },
  },
]);
Alternatively, you can also get the deserialized account data for a specific
account using fetch if you know the address of the account you're looking for.
const account = await program.account.counter.fetch(ACCOUNT_ADDRESS);Similarly, you can fetch multiple accounts using fetchMultiple.
const accounts = await program.account.counter.fetchMultiple([
  ACCOUNT_ADDRESS_ONE,
  ACCOUNT_ADDRESS_TWO,
]);
Lab #
Let’s practice this together by building a frontend for the Counter program from last lesson. As a reminder, the Counter program has two instructions:
initialize- initializes a newCounteraccount and sets thecountto0increment- increments thecounton an existingCounteraccount
1. Download the starter code #
Download
the starter code for this project.
Once you have the starter code, take a look around. Install the dependencies
with npm install and then run the app with npm run dev.
This project is a simple Next.js application. It includes the
WalletContextProvider we created in the
Wallets lesson,
the idl.json file for the Counter program, and the Initialize and
Increment components we’ll be building throughout this lab. The programId of
the program we’ll be invoking is also included in the starter code.
2. Initialize #
To begin, let’s complete the setup to create the Program object in
Initialize.tsx component.
Remember, we’ll need an instance of Program to use the Anchor MethodsBuilder
to invoke the instructions on our program. For that, we'll need an Anchor wallet
and a connection, which we can get from the useAnchorWallet and
useConnection hooks. Let's also create a useState to capture the program
instance.
export const Initialize: FC<Props> = ({ setCounter }) => {
  const [program, setProgram] = useState("")

  const { connection } = useConnection()
  const wallet = useAnchorWallet()

  ...
}
With that, we can work on creating the actual Program instance. Let's do this
in a useEffect.
First we need to either get the default provider if it already exists, or create
it if it doesn't. We can do that by calling getProvider inside a try/catch
block. If an error is thrown, that means there is no default provider and we
need to create one.
Once we have a provider, we can construct a Program instance.
useEffect(() => {
  let provider: anchor.Provider;

  try {
    provider = anchor.getProvider();
  } catch {
    provider = new anchor.AnchorProvider(connection, wallet, {});
    anchor.setProvider(provider);
  }

  const program = new anchor.Program(idl as anchor.Idl, PROGRAM_ID);
  setProgram(program);
}, []);
Now that we've finished the Anchor setup, we can actually invoke the program's
initialize instruction. We'll do this inside the onClick function.
First, we’ll need to generate a new Keypair for the new Counter account
since we are initializing an account for the first time.
Then we can use the Anchor MethodsBuilder to create and send a new
transaction. Remember, Anchor can infer some of the accounts required, like the
user and systemAccount accounts. However, it can't infer the counter
account because we generate that dynamically, so you'll need to add it with
.accounts. You'll also need to add that keypair as a sign with .signers.
Lastly, you can use .rpc() to submit the transaction to the user's wallet.
Once the transaction goes through, call setUrl with the explorer URL and then
call setCounter, passing in the counter account.
const onClick = async () => {
  const sig = await program.methods
    .initialize()
    .accounts({
      counter: newAccount.publicKey,
      user: wallet.publicKey,
      systemAccount: anchor.web3.SystemProgram.programId,
    })
    .signers([newAccount])
    .rpc();

  setTransactionUrl(`https://explorer.solana.com/tx/${sig}?cluster=devnet`);
  setCounter(newAccount.publicKey);
};
3. Increment #
Next, let’s move on the the Increment.tsx component. Just as before, complete
the setup to create the Program object. In addition to calling setProgram,
the useEffect should call refreshCount.
Add the following code for the initial set up:
export const Increment: FC<Props> = ({ counter, setTransactionUrl }) => {
  const [count, setCount] = useState(0)
  const [program, setProgram] = useState<anchor.Program>()
  const { connection } = useConnection()
  const wallet = useAnchorWallet()

  useEffect(() => {
    let provider: anchor.Provider

    try {
      provider = anchor.getProvider()
    } catch {
      provider = new anchor.AnchorProvider(connection, wallet, {})
      anchor.setProvider(provider)
    }

    const program = new anchor.Program(idl as anchor.Idl, PROGRAM_ID)
    setProgram(program)
    refreshCount(program)
  }, [])
  ...
}
Next, let’s use the Anchor MethodsBuilder to build a new instruction to invoke
the increment instruction. Again, Anchor can infer the user account from the
wallet so we only need to include the counter account.
const incrementCount = async () => {
  const sig = await program.methods
    .increment()
    .accounts({
      counter: counter,
      user: wallet.publicKey,
    })
    .rpc();

  setTransactionUrl(`https://explorer.solana.com/tx/${sig}?cluster=devnet`);
};
4. Display the correct count #
Now that we can initialize the counter program and increment the count, we need to get our UI to show the count stored in the counter account.
We'll show how to observe account changes in a future lesson, but for now we
just have a button that calls refreshCount so you can click it to show the new
count after each increment invocation.
Inside refreshCount, let's use program to fetch the counter account, then
use setCount to set the count to the number stored on the program:
const refreshCount = async program => {
  const counterAccount = await program.account.counter.fetch(counter);
  setCount(counterAccount.count.toNumber());
};
Super simple with Anchor!
5. Test the frontend #
At this point, everything should work! You can test the frontend by running
npm run dev.
- Connect your wallet and you should see the
Initialize Counterbutton - Click the
Initialize Counterbutton, and then approve the transaction - You should then see a link at the bottom of the screen to Solana Explorer for
the
initializetransaction. TheIncrement Counterbutton,Refresh Countbutton, and the count should also all appear. - Click the
Increment Counterbutton, and then approve the transaction - Wait a few seconds and click
Refresh Count. The count should increment on the screen.
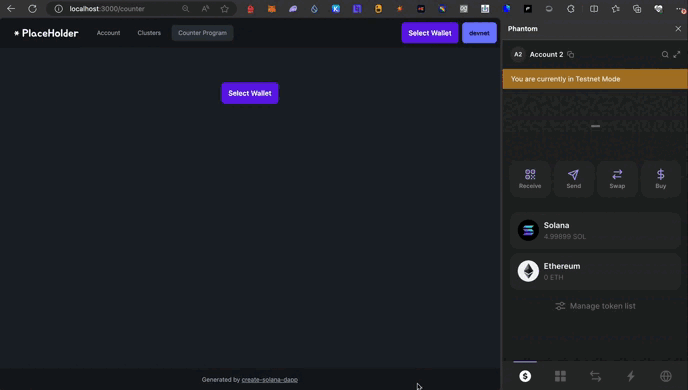 Anchor Frontend Demo
Feel free to click the links to inspect the program logs from each transaction!
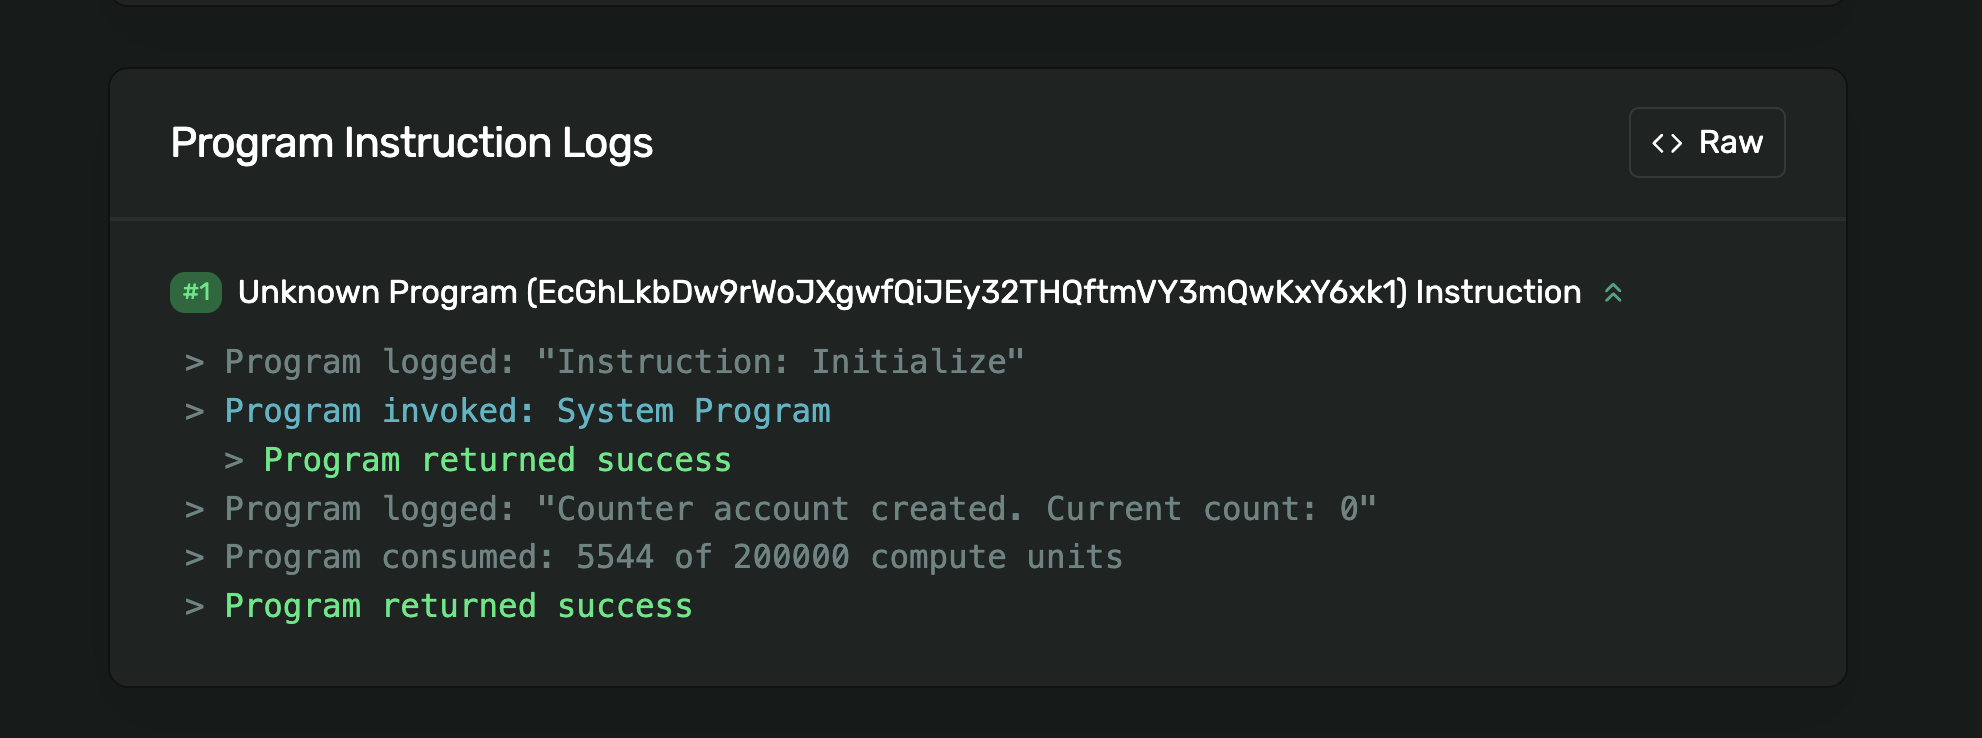 Initialize Program Log
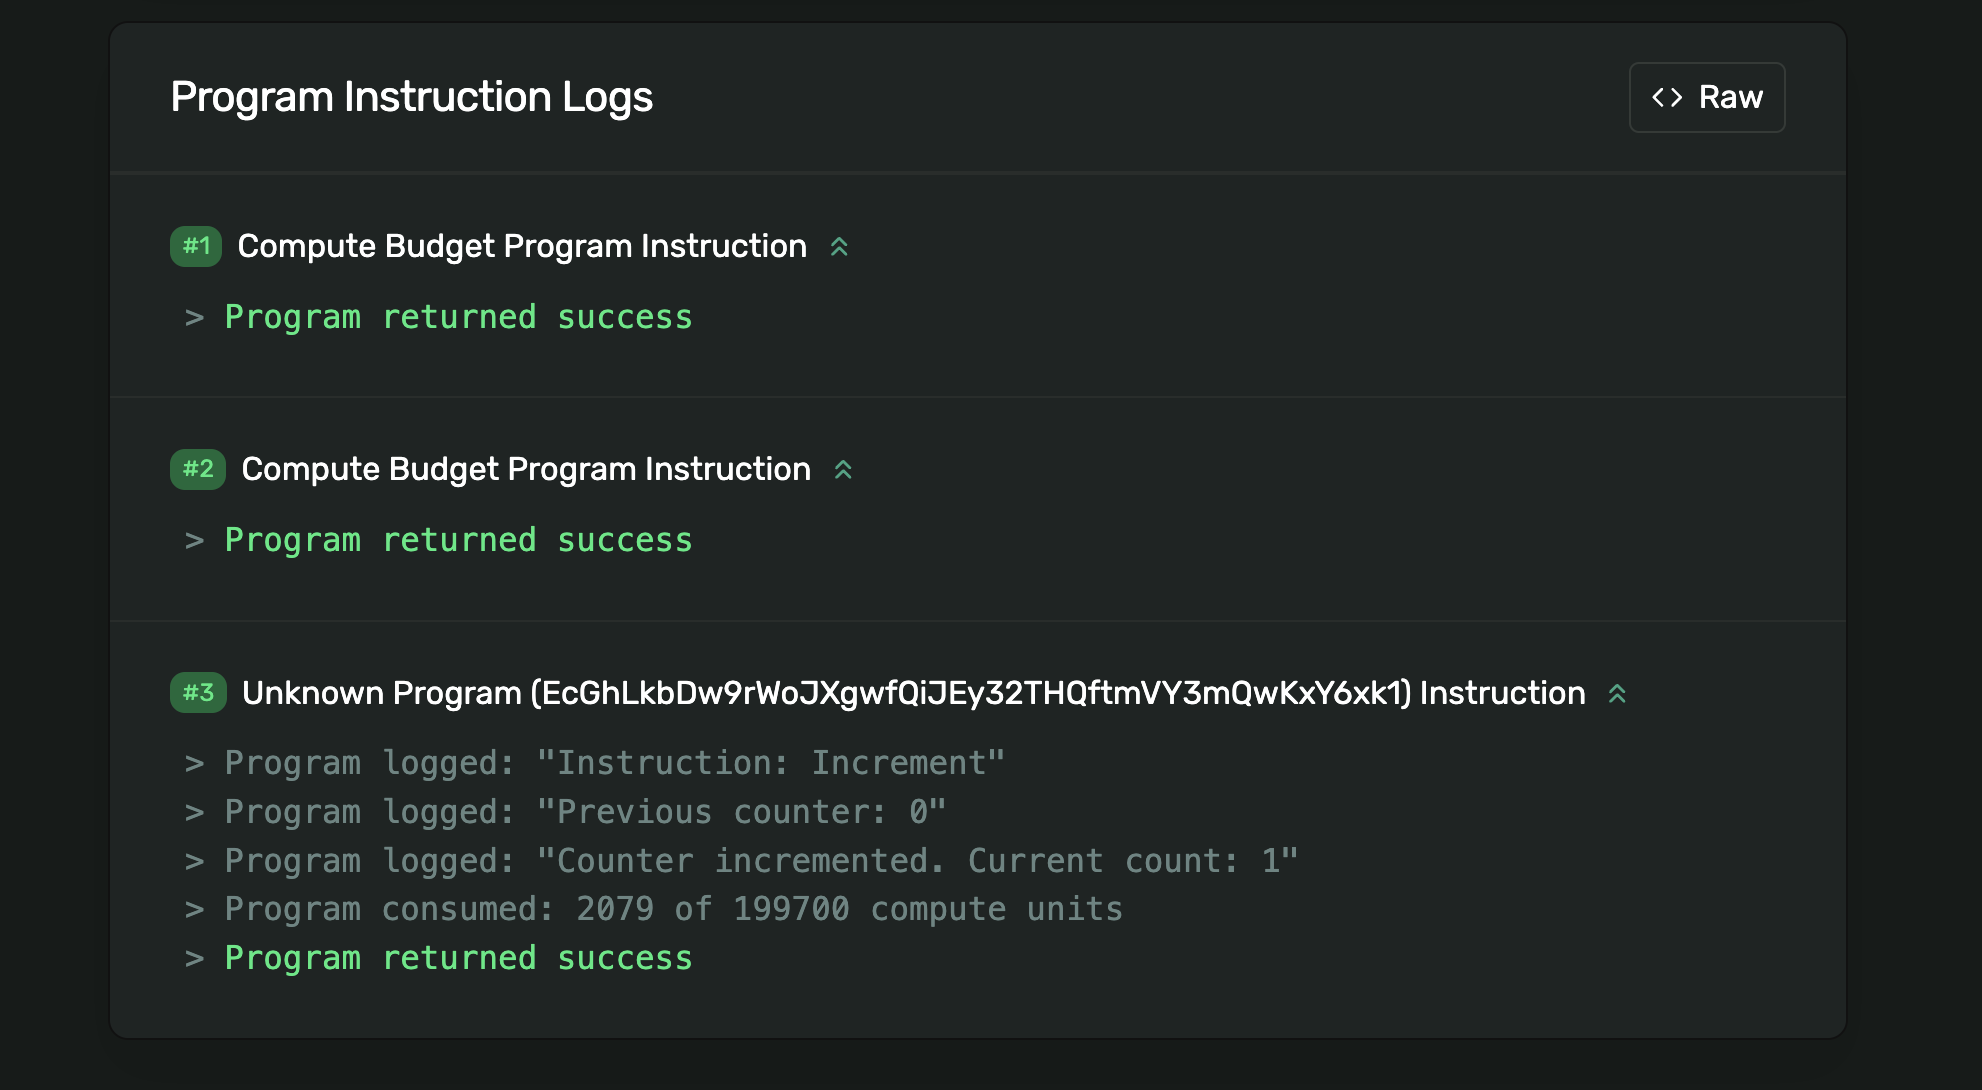 Increment Program Log
Congratulations, you now know how to set up a frontend to invoke a Solana program using an Anchor IDL.
If you need more time with this project to feel comfortable with these concepts,
feel free to have a look at
the solution code on the solution-increment branch before
continuing.
Challenge #
Now it’s your turn to build something independently. Building on top of what we’ve done in the lab, try to create a new component in the frontend that implements a button to decrements the counter.
Before building the component in the frontend, you’ll first need to:
- Build and deploy a new program that implements a
decrementinstruction - Update the IDL file in the frontend with the one from your new program
- Update the
programIdwith the one from your new program
If you need some help, feel free to reference this program.
Try to do this independently if you can! But if you get stuck, feel free to reference the solution code.
Push your code to GitHub and tell us what you thought of this lesson!